This post may contain affiliate links.
Gardening in the tropics is different. It’s not as easy as many gardeners in cooler climates might think. We in the tropics have to deal with phenomenal amounts of rain that can wash away soil and nutrients, change soil pH and leave food plants sitting in a swamp.
We have to learn new techniques to cope with a tropical climate, sometimes we have to build our soil from scratch and we, like many tropical gardeners started on a base of clay, no topsoil whatsoever.
Is Your Tropical Garden Clay or Sand?
We had to start by building soil. Like many owners of new build homes, our garden had been stripped of topsoil. We bought a solid sheet of orange clay, no soil at all. Others in our neighbourhood have sand.
A tropical rainforest has some of the richest soil imaginable, naturally built over millennia, but decades of intensive farming (our house is on a former sugar cane field) followed by developers meant we had to start from scratch. Building soil isn’t hard to do and thankfully, a tropical climate allows us to do that faster.
Don’t try and plant into the clay, you’ll be wasting your time. Instead, build up. Imagine that rainforest floor, what grows, falls and returns to the soil to be broken down fast in hot wet conditions. That’s what you’re trying to replicate and that is the first step towards permaculture and sustainable, natural, chemical-free gardening.
But always read the small print – some plants don’t like too much organic stuff around their roots and would prefer something more mineral-based, read up on what individual plants need.
I was lucky, I had some natural troughs in my garden which I filled with branches, leaves and grass clippings along with vegetable kitchen scraps. Those areas are now good rich soil.
We turfed over some bare clay, it worked, but neglectful tenants let our grass die and all the soil that had accumulated under the protective soil layer washed and blew away.
We also have a natural slope at the rear of our garden. This makes a good home for plants such as our grapefruit tree, which like good drainage through the wet season.
Never Let Your Soil Be Naked, Cover It Up! “
If you have bare soil, cover it. Cover it in cardboard, mulch it with anything, plant ground cover green mulch plants, anything, just keep it covered to prevent soil erosion, trap moisture and allow decomposition and soil creation. This is probably the single most important thing you could do. Soil must never be bare in a tropical climate.
Start With a Small Garden Bed
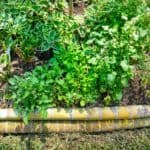
Don’t spread yourself and your resources too thinly. Start small. Start with one raised bed. Build a box from chemical-free wood, edge it with branches, edge it with bottles, buy a raised garden bed or just make a simple mound without edging, but build up.
Fill the mound with organic, compostable good stuff, mulch it thickly and let the soil brew. Add some soil or compost and plant into your raised bed. Keep it muched, keep it moist and things will grow including those vital micro-organisms.
Some bought bagged compost is terrible, your plants won’t thrive. Add some well rotted manure or home made compost, this should help a lot. Continue to top dress (add a layer on top of the soil) now and then. You may need to scrape back the mulch to do this. It doesn’t need to be a full layer, a handful around individual plants should be fine.
When building a new bed we generally cover weeds or grasses with cardboard to kill them off and stop them growing up through the new bed. I honestly don’t think this is really necessary. Most things are going to die under a thick layer of compost, soil, and mulch, but everyone says to do it – so do it if you want to. Cordylines are the only plant I’ve seen grow up throughthe full depth of a new raised bed from existing roots.
Cardboard or newspaper will also help hold moisture as it smothers weeds. Make sure your cardboard is free of tape and isn’t plastic coated. If it’s shiny, it’s plastic coated, don’t use it. I’d be cautious of cardboard with a lot of ink too.
Because you’re going to have to find a lot of plant material to build your soil it’s best not to go crazy and cultivate your whole garden just yet. The more plant waste your garden produces, the faster you can build.
We collect palm fronds from neighbours and mulch them. We bought a top-end mulcher. We think it easily paid for itself within weeks as it churned our mountains of chopped vegetation for mulching and for the compost heap.
If you don’t want to spend so much just yet, chop everything as finely as you can before composting. The finer the chop the faster the compost. Don’t forget you can even bury branches to break down and feed your beds (hugelkulture). Anything that was once a plant can be used to make soil and provide nutrients. If you can balance the amount of green leafy waste to the amount of brown dry waste, that’s perfect, it should work well.
We add rotten eggs or those that fail to hatch to the bottom of our new raised beds. There has never been any smell and these materials help the soil retain moisture.
Do not plant directly into this non-composted filler material, always add a good depth of good soil on top. The branches and organic matter will take years to break down fully. They are not a suitable medium for growing plants just yet. As they break down the soil level will drop and need topping up. For this reason, don’t add perennials or any permanent planting into raised beds containing “Hugelculture” or “lasagne” type materials. Stick to annuals with shallow root systems at first.

